
Hairlines
In graphic design, a “hairline” is a line drawn with the thinnest stroke possible on a given output device. If we’re drawing with Sharpies and a ruler, our hairlines will be comparatively thick. If we’re printing on LaserJets, they’ll be pretty darn thin.
On iOS devices, hairlines should be exactly one pixel wide. But iOS doesn’t let us draw in pixels, it asks us to draw in points. And points don’t uniformly convert to pixels across all platforms. And even if they did, Core Graphics’s coordinate system lines up on the boundaries between pixels, not the pixels themselves. So getting hairlines right can be a little tricky.
Going Off the Grid
Check out the following 5x5 point grid. Let’s say we want to draw a 1-point thick line between the two blue dots — that is, between (0,2) and (5,2).
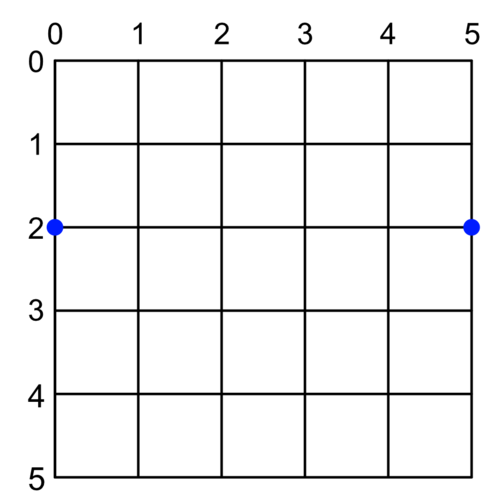
We might expect something like:
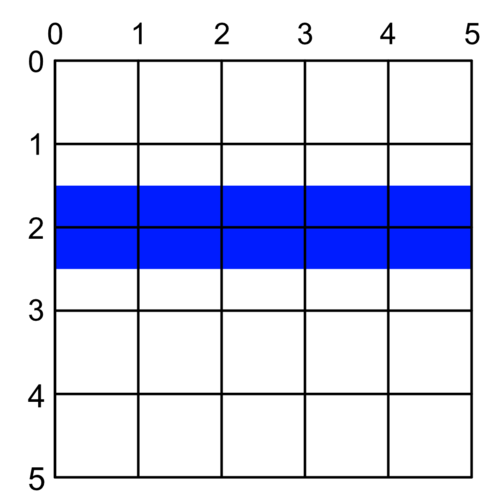
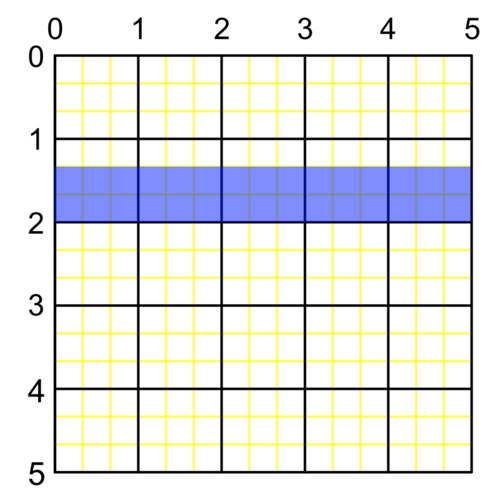
But what we’ll actually get (assuming, for the moment, that pixels and points are equivalent) is:

What happened?
It turns out our coordinate system (the black lines in our image) traces the space between points, not the points themselves. So by drawing right along the path at Y = 2, we’re asking for a line to be drawn between points.
That works just fine, mathematically. But in the physical world, our line will be represented by square pixels that are either on or off. Anything “in between” is gets averaged out with anti-aliasing. So instead of a 1-point blue line, we get a 2-point half-blue line.
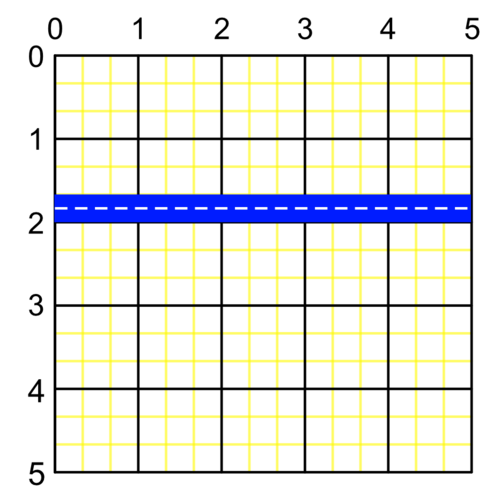
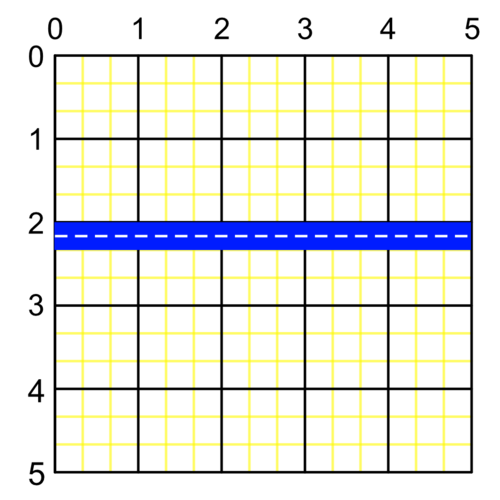
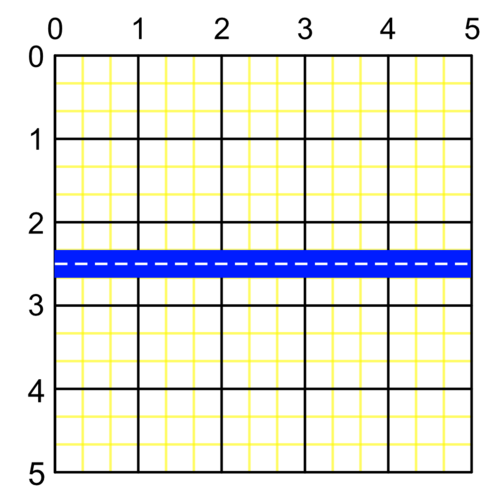
If we want our perfect thin blue line, we have to draw it down the middle of a point, not in-between. For example, where Y = 1.5 or Y = 2.5:

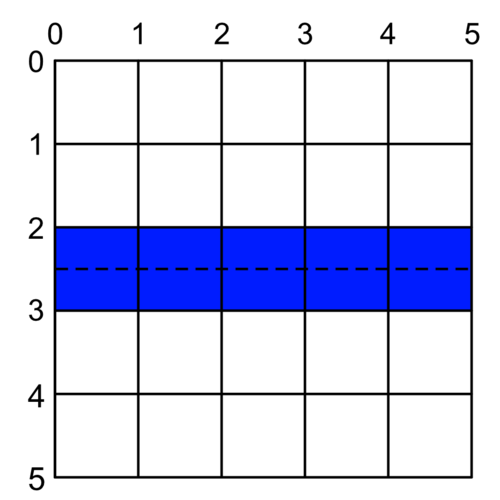
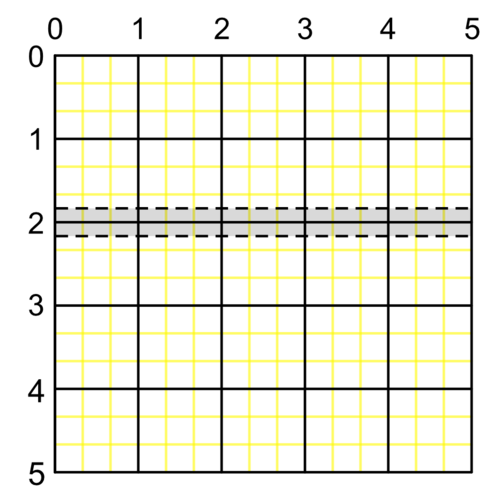
More generally, to have a perfect line, we have to either round up or round down to the nearest mid-point between grid lines.
Or, graphically, for any Y in the shaded area, we need to either round it up to the top dashed line or round it down to the bottom dashed line to draw a perfect non-antialiased line:

How do we choose if we want to draw above or below our given coordinate? It depends on the situation. If we’re trying to draw a line at the very top of a clipping view, we’ll want to draw slightly below the Y we give it. Otherwise it will clip and not be visible. The same goes in reverse for drawing at the bottom of a view.
If we call this preference to draw above or below our point the line’s bias we can create a function that draws perfect 1-point-wide lines like so:
func singlePointLine(at y: CGFloat,
                     in rect: CGRect,
                     topBias: Bool = true) {
  let adjustedY = round(y) + (topBias ? -0.5 : 0.5)
  let line = makeLine(at: adjustedY, in: rect)
  strokePath(line, width: 1.0)
}

func makeLine(at y: CGFloat,
              in rect: CGRect) -> UIBezierPath {
  precondition((rect.minY...rect.maxY).contains(y))
  let line = UIBezierPath()
  line.move(to: CGPoint(x: rect.minX, y: y))
  line.addLine(to: CGPoint(x: rect.maxX, y: y))
  return line
}

func strokePath(_ path: UIBezierPath,
                width: CGFloat) {
  path.lineWidth = width
  UIColor.blue().setStroke()
  path.stroke()
}
My God, It’s Full of Pixels
Sadly, we don’t want to draw perfect single point lines. We want to draw perfect single pixel lines. On non-retina devices, those are the same thing. But on everything else, each point is made up of several pixels. “Plus” model iPhones, for example, actually have three pixels per point, represented by the yellow lines here:
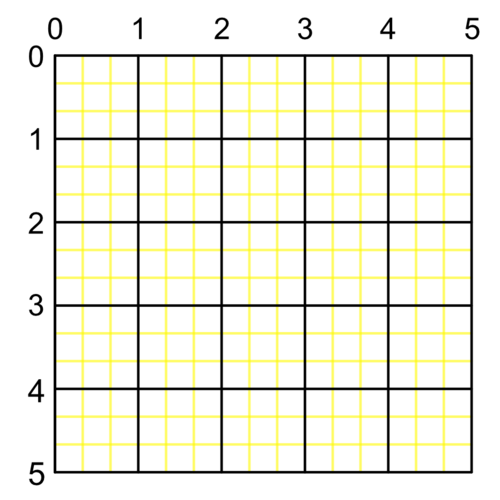
So rather than drawing between the black point-lines of our previous illustrations, we want to draw between the yellow pixel-lines:
Which will give us a line at Y = 1.8333 or Y = 2.1666, depending on the bias:

That means we can’t use our simple round() function anymore (as it only rounds to whole numbers). We have to write our own function that rounds up or down to the nearest fraction depending on the bias we give it:
func round(from: CGFloat,
           fraction: CGFloat,
           down: Bool = true) -> CGFloat {
  let expanded = from / fraction
  let rounded = (down ? floor : ceil)(expanded)
  return rounded * fraction
}
Then we just need to know what fraction of a point represents a pixel. We do this using the scale of our main screen:
var pixelUnit: CGFloat  {
  return 1.0 / UIScreen.main().scale
}
Then we can draw a pixel-thick line rounded to the nearest pixel instead of the nearest point:
//So close...
func almostSinglePixelLine(at y: CGFloat,
                           in rect: CGRect,
                           topBias: Bool = true) {
  let adjustedY = round(from: y,
                        fraction: pixelUnit,
                        down: topBias)
  let line = makeLine(at: adjustedY, in: rect)
  strokePath(line, width: pixelUnit)
}
Which is really close to what we want. But this rounds us to the nearest fraction of a point corresponding to a pixel. Or, to put it another way, it snaps us to the yellow lines in our illustration, which actually run between pixels:
If we want to avoid the anti-aliasing shown here, we need to snap to the exact middle of the pixel. That is, halfway between the yellow lines.
One way to do this would be to add ½ of our pixelUnit to our rounded value:
let offset = pixelUnit/2.0
let adjustedY = round(from: y,
                      fraction: pixelUnit,
                      down: topBias) + offset
which puts us right in the middle of our pixels, like we want. But it shifts both our lines down below Y = 2.
We really want our top-biased line to be just above 2 and our bottom-biased line to be just below it.
To compensate, we subtract offset from our y before rounding:
func singlePixelLine(at y: CGFloat,
                     in rect: CGRect,
                     topBias: Bool = true) {
  let offset = pixelUnit/2.0
  let adjustedY = round(from: y - offset,
                        fraction: pixelUnit,
                        down: topBias) + offset
  let line = makeLine(at: adjustedY, in: rect)
  strokePath(line, width: pixelUnit)
}
And there we have it. Pixel-perfect hairlines on either side of Y = 2 (depending on the topBias param).
Here’s a gist of all of this put together. Keep in mind the structure has been chosen for maximum readability, not because having a bunch of free functions hanging around for drawing lines is a good idea :)